has been added to your cart.

4 Ways To Fix Your Low End
In today’s article, we’ll be going through a few of our favourite mixing techniques to help you achieve a tighter low end.
Everyone wants to know how to mix a kick and bass perfectly. We hear it all the time! How on earth do you get that powerful low end that leaps out of the speakers?
Getting your kick and bass to work together is hard work, but simply understanding a few of the fundamental processes will have you gluing together these parts with ease. In today’s article, we’ll be going through a few of our favourite mixing techniques to help you achieve a tighter low end.
Mono
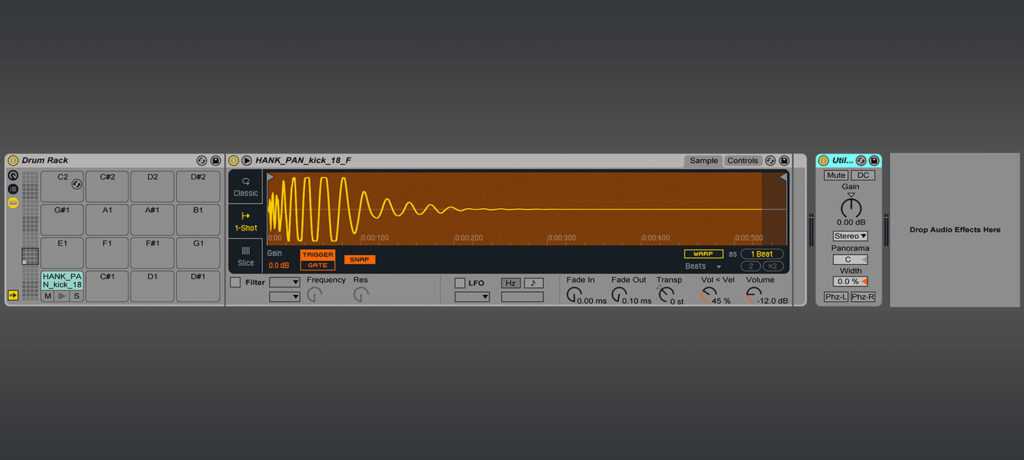
Let’s start from the top, let’s assume that you have already selected your kick and bass, but nothing else. First off, put your kick in mono, simple as that. This will ensure there are no phase issues in your mix. It’s super simple and very easy to do, plus it has loads of benefits if you plan on playing your music in a club. For Ableton users, pull the stock ‘Utility’ plugin onto your kick channel and reduce the width all the way down to zero.
EQ
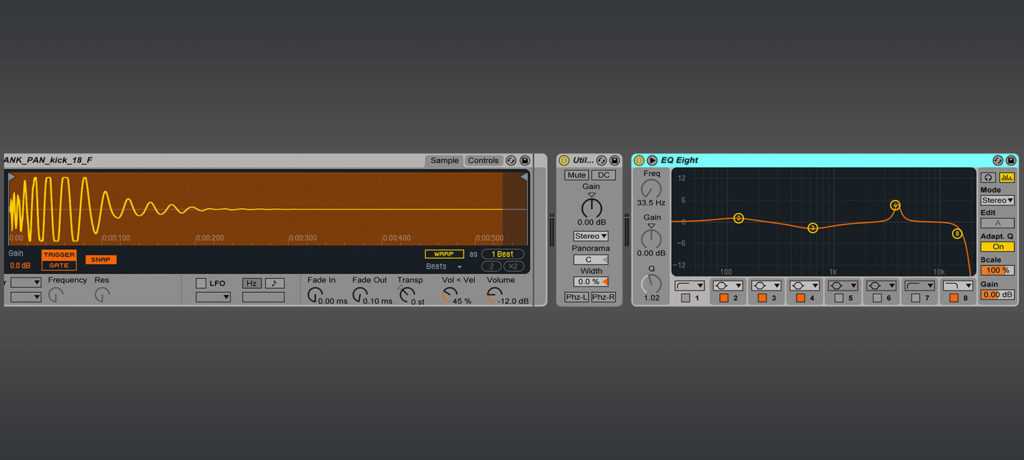
Next up, you’ll want to start thinking about EQ. Your best friend when it comes to tweaking your kick! This is a totally subjective process, so it’s all about gauging what’s best for you.
16khz
First up, think about the real high end in your kick. Does it sound harsh and airy? If yes, try rolling off everything above 16khz to remove those unpleasant frequencies.
4khz
Think about how much presence you like in your kick. If you link a punchy warm kick, try boosting the 4khz range, this will allow your kick it to cut through the mix much more apparently.
600-700hz
The 600-700hz area is often cut to remove any unwanted boxiness.
400hz
Around 400hz is where a lot of the so called ‘mud’ lives in your kick. Perhaps try cutting some of this area to create a cleaner tighter sound.
120hz
If you need more thump, boost around 120hz.
30hz
Finally, it’s common practice to cut your kick under 30hz to eliminate any rumble that could upset the balance.
Tuning
Generally, you want your kick to be in relation to your bass by way of key or note. For this example, we’re going to put our kick in the same note as our bass, but in reality, it’s all about experimentation.
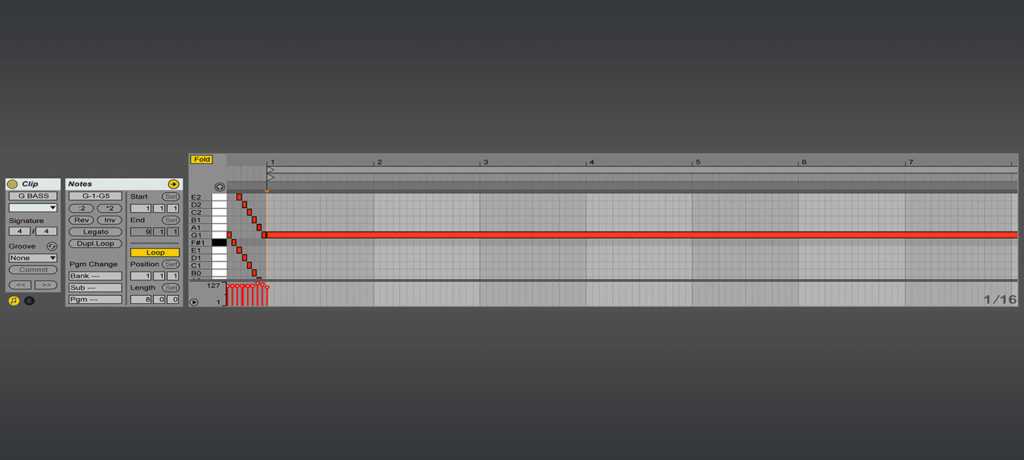
First off, you’ll need to know the key of your bassline, which you should know already if you wrote it. Let’s say your bassline is in G. Next up you need to figure out the fundamental frequency of your bass. To do this, start by duplicating your existing bassline track, solo the new track, and remove all the midi information from it.
Next, we want to create a long note on our new midi track. Since our bass is in G, we’re going to find the ‘tonic note’ which is the main note in your key, for this example it will be G0 (or G1, G2, G3, etc depending what octave your bassline is). Find your tonic note and stretch it out on your midi roll so that covers at least 4 bars.
Grab Ableton’s ‘Spectrum Analyser’ plugin and drag it onto your new midi track. Open the plugin by pressing the black triangle. Press play and you should be able to hear the long bass note you created. Whilst the note is playing, check your frequency analyser to find your fundamental frequency, it will be the most prominent spike on the spectrum analyser.
In this example, our fundamental frequency hits around 49hz which is a G – so that makes sense.
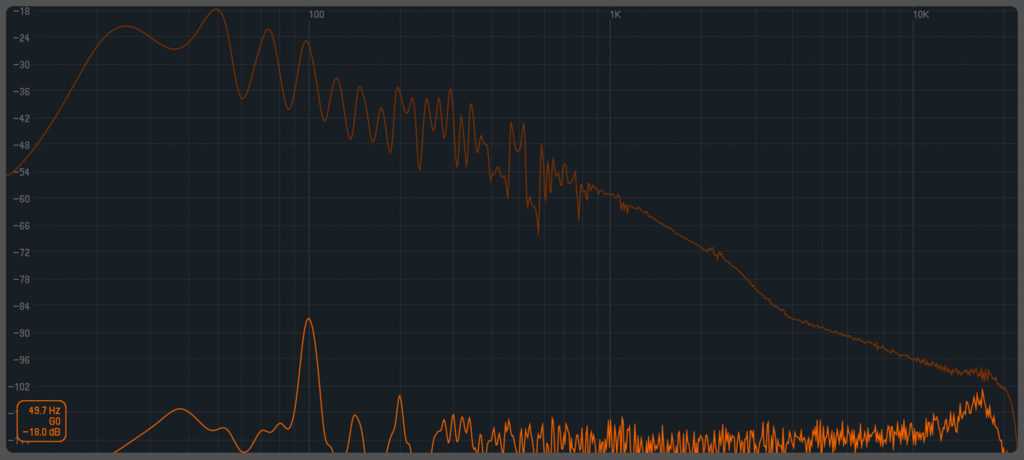
Now that we’ve worked out our bass fundamental is 49hz, we can go into our kick and work out where that’s hitting by using the same process. So, solo your kick channel, drag the ‘Frequency Analyser’ onto it and see if you can find the fundamental frequency. In our example, our kick is hitting at about 44hz which is a F.
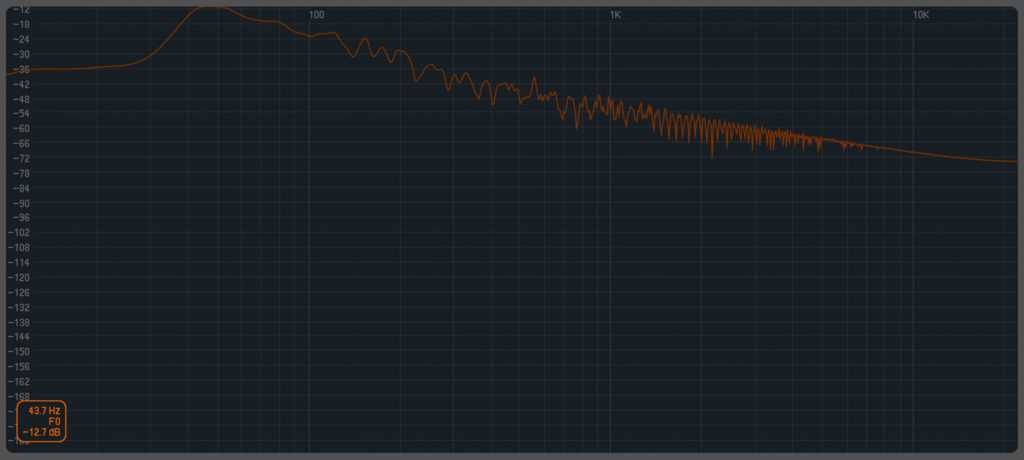
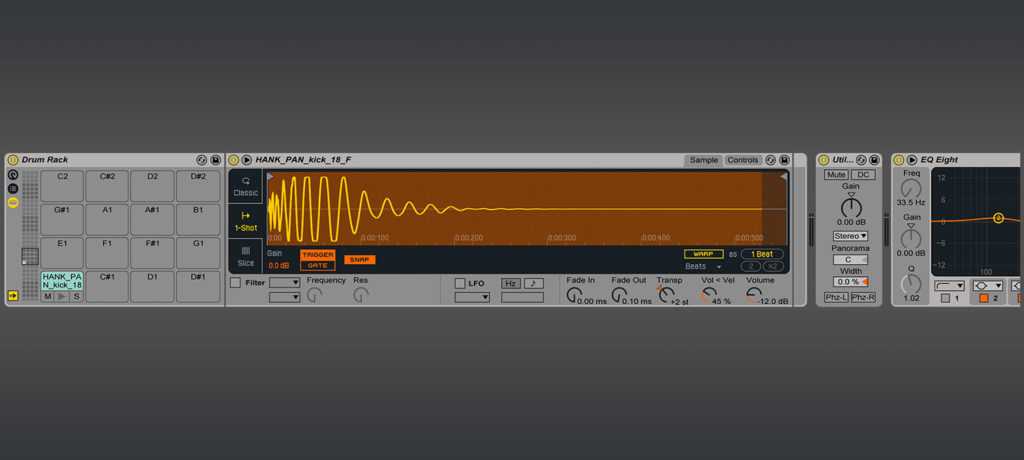
Now that we’ve worked out the note that our kick is in, we can quite easily transpose it up or down, so it fits with the bass. Generally, when transposing a kick, it’s a toss-up between transposing the kick up or down. Ultimately it should come down to whatever sounds best.
For our example, we need to get our kick from F to G, so I’m going to transpose it up 2 semitones to G, which means it’s now in the same note as the bass. Always be wary of transposing your kick too much. Too many steps up or down can create some unwanted artefacts.
Sidechaining
Almost any kick and bass relationship will need a little love between the transients, be it phase alignment or sidechaining. The next step in our process involves a little sidechaining.
In order for our kick to fully cut through the bassline, we need to think about adding some compression. Sidechaining is a type of compression that momentarily reduces the signal of a sound, and this is what we want to do to our bass.
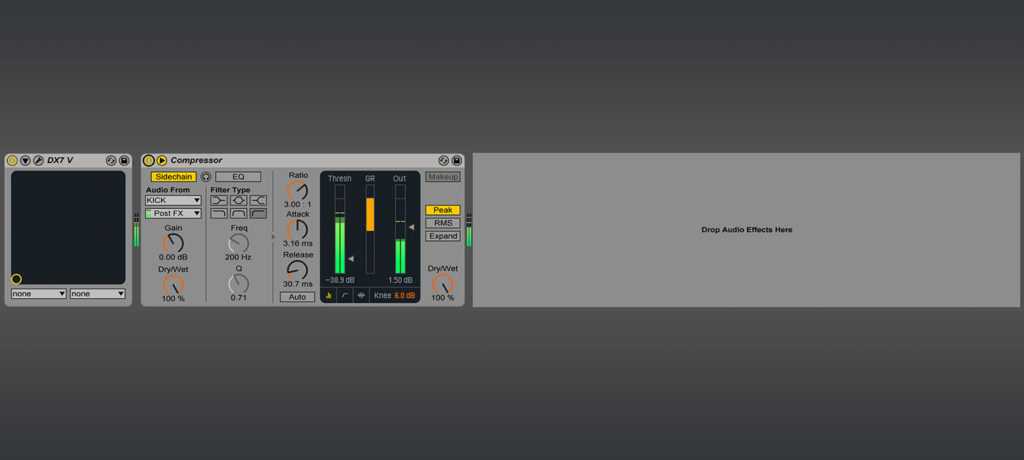
First up go to the audio effects folder and drag the ‘Compressor’ plugin onto the original bass track you’ve made.
Click the black triangle on the top left of the compressor, then press the sidechain button, then click on the ‘Audio From’ tab and set it to ‘Kick’.
At this point, it’s time to experiment with some of the settings on the compressor to achieve the desired sidechain effect. Most sidechains will require different settings and the desired sound is almost always subjective. For Tech House we don’t exactly want a big pumping sound where the effect is obvious, instead we want a smooth and discrete presence.
We suggest an attack between 2-5ms, this will help accentuate the kick’s attack before backing off to let the kick’s body through. For the release, we suggest starting at about 20ms and then slowly turn it up until you can hear the whole kick coming through. Ratio, we suggest starting somewhere between 2 – 4.00:1. Similarly, play around with the threshold until the mix sounds right for you.
Now your kick should have more than enough room to cut through the bass, creating a nice crisp, punchy sound.
Try these simple tips on your next track, you may well find it helps you get a bigger, better, kick and bass relationship!
Login
X
