has been added to your cart.

How to Sample a Kick Drum from Any Record
Is there a kick drum you like in a track you've heard? Here's how you can use it in your own productions....
The Kick Drum is one of the most fundamental parts to any good dance music record. It’s vital that it translates well in the club. It’s easy to spend hours tweaking a kick drum sample until it sounds club ready.
Alternatively, a method many producers use, is to find a record with a kick drum they know works well in the club and then sample it straight from the track; saving them a load of time and stress.
In this article we will take you through how you can do this, step by step in Ableton Live:
1) Drop the track you would like to sample into Ableton and turn off Warping.
2) Find a part in the track where the kick is exposed.
3) Add a Multiband dynamics plug in.
4) Set the low cutoff to 90Hz and the high cut off to 1.3kHz.
5) Duplicate the channel twice.
6) Solo the frequency bands.
- On the 1st channel, solo the low frequencies.
- On the 2nd channel, solo the mid frequencies.
- On the 3rd channel, solo the high frequencies
Your channels should sound something like this:
7) ‘Freeze’ and ‘Flatten’ the tracks.
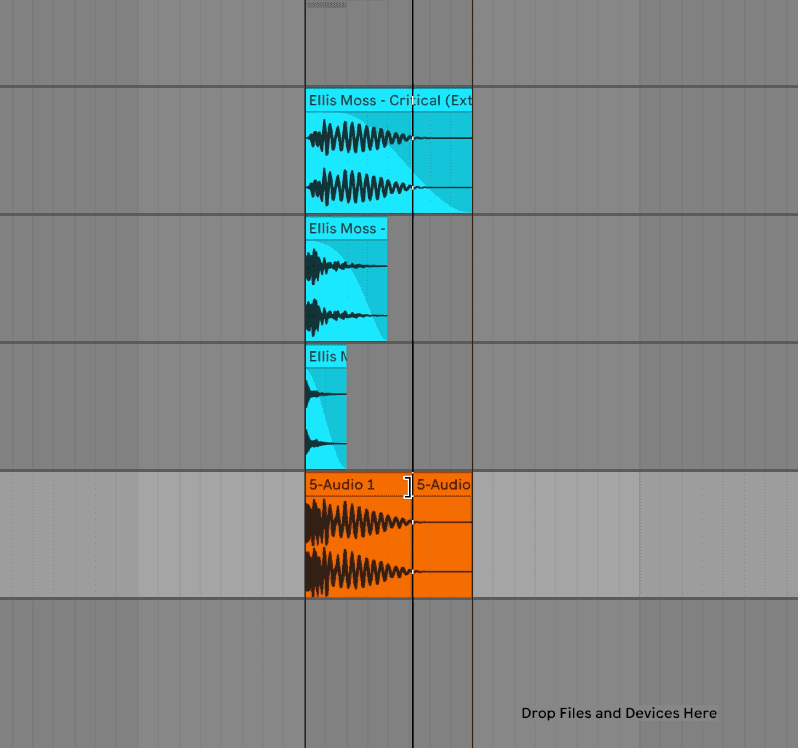
8) Loop around one kick drum.
9) Solo the subs channel, use the fades to isolate the frequencies coming from the kick drum.
Repeat for both the Mids and Highs.
10) Exporting Kick to one file.
- Group the 3 channels
- Add a new audio track
- Set the ‘External In’ to your kick Group
- Arm the audio track
- Press Record
There you have the kick drum:
0:00
0
Want to learn more tricks like this?
We have many bits of advice like this within our interactive courses that can help you take your production game to the next level!
If you want to make it happen in 2023, enquire with us now!

Login
X
