has been added to your cart.

TRACK BREAKDOWN: Maxinne ‘Tell Me Something’ Feat. Laurent L’aimant
Maxinne, one of Toolroom’s top talents, takes us step by step through the making of 'Tell Me Something'
“LAUREN WROTE THE ACAPELLA A COUPLE OF YEARS AGO AND IT HAD BEEN SITTING ON HER HARD DRIVE EVER SINCE. HER VOCAL STOOD OUT STRAIGHT AWAY, SO I’M REALLY HAPPY THAT WE BUILT IT INTO A TRACK.”
Since moving to London from the South Coast and being discovered through the #WeAreListening campaign held at Toolroom HQ, producer Maxinne has turned heads on the electronic dance scene and built solid foundations, garnering the support of Hot Since 82, Annie Mac, Eats Everything and Toolroom’s very own Mark Knight.
With a number of exclusive releases already available on Toolroom Records, Criminal Hype and her own Red Alert imprint, the house/techno producer started 2021 by releasing Tell Me Something featuring vocal talent Lauren L’amaint. An instant club banger, the track highlights Maxinne as one of Toolroom’s top talents and we’re delighted to have her take us step by step through the making of the track.
THE STORY BEHIND TELL ME SOMETHING
I met Lauren L’aimant a couple of years ago through her manager. We already had a couple of tracks in the works, but on this occasion Lauren sent me a bunch of acapellas she’d written and this one stood out straight away so we both agreed to roll with it. It had a really nice, dreamy vocal, so we immediately knew the track’s direction would be a little deeper and more melodic.
Although Lauren recorded the vocal for Tell Me Something a couple of years ago, she wanted to keep it fresh and rerecord it. She sent me the new stems remotely and her vocal inspired me so much that the drums and instrumental elements came together quite organically and pretty swiftly too. We definitely wanted to create emotion with this track, and Lauren had input on the production and songwriting front too, so it was a proper collaboration.
TRACK OVERVIEW
The first draft of the track didn’t have an arpeggio on it, but after listening to it many times we thought that it would sound perfect if we allowed an arpeggio to build the journey and add more melody. I also added in some vocal ad libs throughout the process; taking little vocal cuts and working them into each bar, which I feel really adds to the track’s vibe and groove.
The track starts with quite a stripped back groove on a high-pass filter and then at 30 seconds the filter turns off and the bassline comes in. As the track builds you can hear the first vocal come in at 46 seconds and you’ll also hear the arpeggio gradually building up, automated to become louder.
At 1.17 there’s a short 8-bar break where the track introduces more of the vocal and, for the first time, the synth stabs. There’s also a key change in the bassline that shifts down an octave. After the first break at 1.33 the arpeggio is automated to reduce in volume and then builds up again until the main drop. At 2.04 we tried to build the energy more, so an open cymbal ride comes in along with a reoccurring vocal to anticipate suspense towards the main break.
The main breakdown starts at 2.19 as the percussion elements come out of the arrangement and you hear the kick and bassline together with the reoccurring vocal and arpeggio. That’s the point at which the main vocal comes in and the main break and arpeggio builds up. Then, just before the drop, you hear a kick-roll come in for 2 bars.
The main drop is at 3.06 and the track’s now at its peak with the arpeggio continuing on and the vocal coming back in at 3.37 for 16 bars before gradually breaking down for the outro.
BASSLINE
I love happy accidents and get so excited by these moments. With this track it was the bassline. I was flicking through bass samples and came across this really warm, deep sound that I knew would work when auditioned against the vocal because it was already in key, so I opened up a MIDI channel, dragged the sample in and made my own groove from there.

The above image shows the original bass sample that I found and put into a MIDI channel sampler. The original sample was actually quite different to what I created – it was much more melodic, but for this track I knew the bassline notes needed to be quite straight because there was already a lot of melody within the vocal, synths, arpeggio and other musical elements.
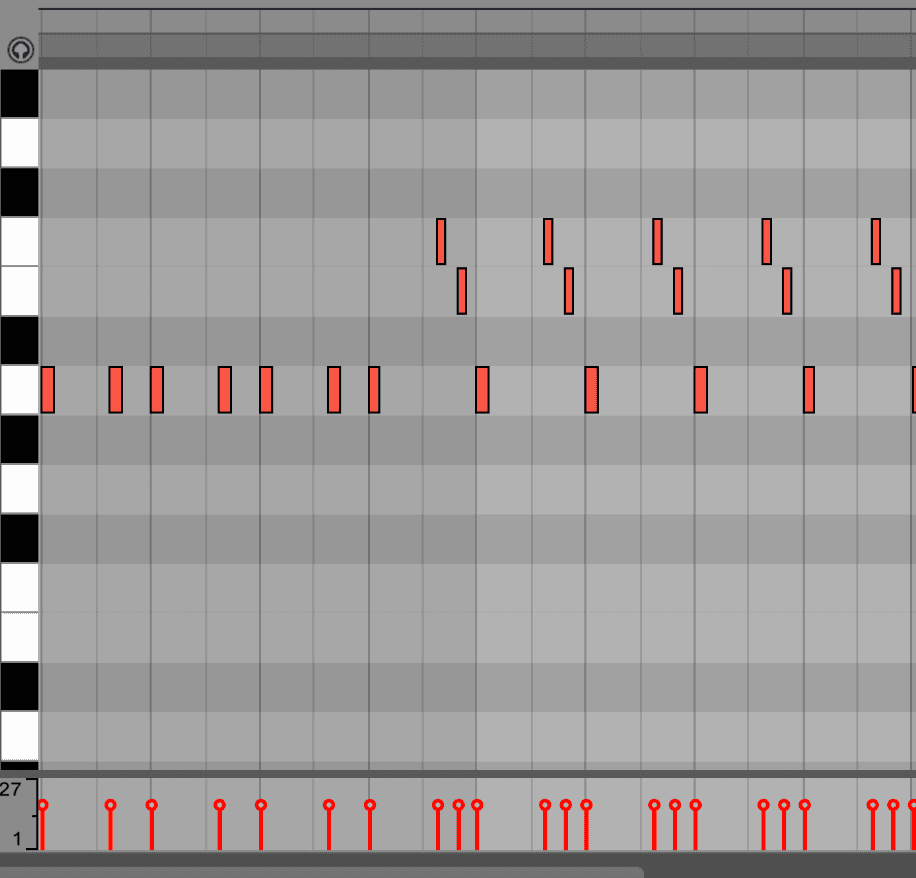
The bassline is quite deep and has this nice tone that cuts through in the mix to really drive the track. It has a nice sub sound too, which works well with the kick drum to create a chunky low-end. I used an Ableton EQ along with the Glue Compressor, side-chaining the bassline against a ghost kick drum.
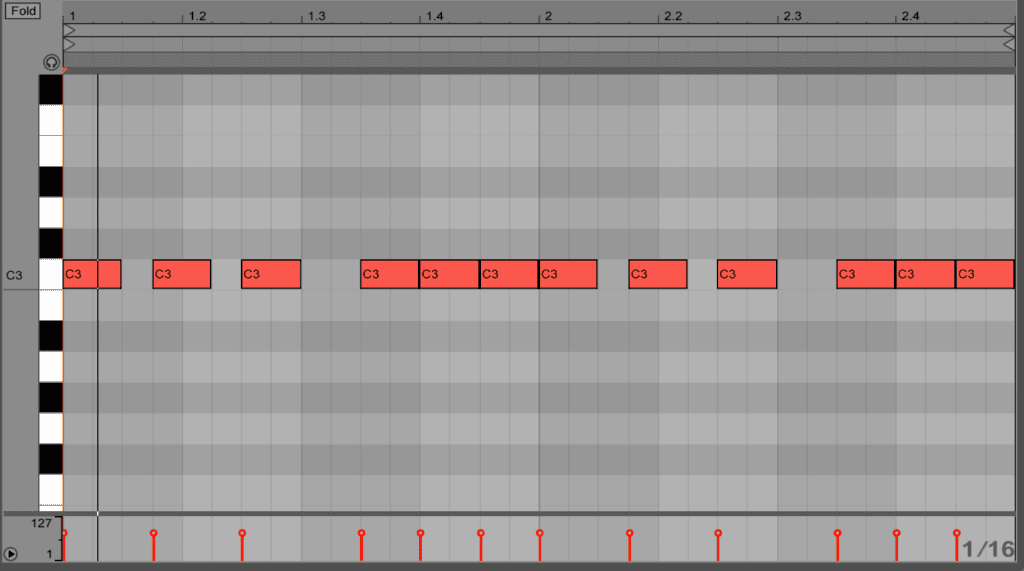
The above image shows how I played the notes in the MIDI channel and made my own groove using only the first note of the sample. You can see there are 6 notes in every bar. In the original sample, there were 5 notes in every bar and a variation in the 4th bar of the sample.
DRUMS
I’ve built a lot of sounds up over the years and keep them in folders on my computer because it speeds up my workflow and saves a lot of time. These folders contain lots of go-to samples, so for Tell Me Something the hats, claps, snares and shakers all came from there. Similar to a lot of my productions, I wanted the kick drum to be quite chunky and the percussion to have a nice shuffle in order to create the groove. The percussion is quite snappy but also stripped back – it’s the bassline and synths that are really driving it!
Some of the drums were written through MIDI channels as you can quantise them easily that way and create your own grooves, then all the sampled fills and shakers we’re added in. I find that every percussion/drum sound needs to have its own space in the mix because layering sounds on top of each other doesn’t sound clean and they’ll just end up clashing with each other. With that in mind, I started by writing the hats in before adding the shaker, then Lauren added the fills and a few more percussion elements.
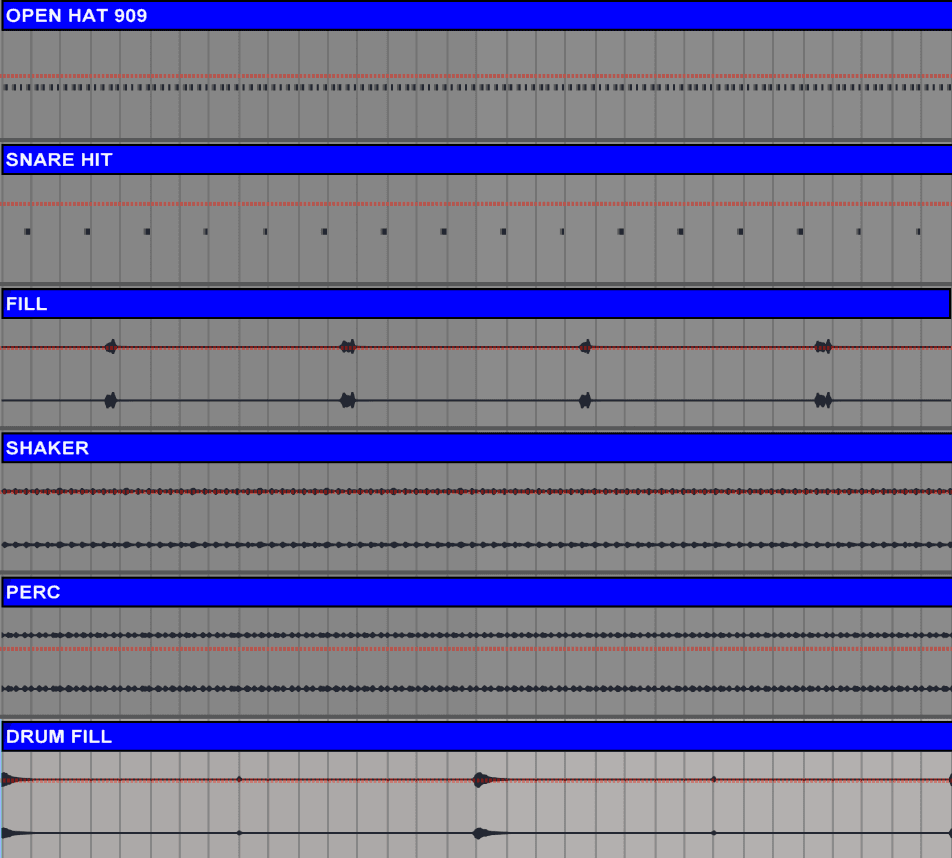
Above, you’ll see that some of the drums were written through the MIDI channels, such as the open hat and snare hits. This is great if you want to quantise things easily and create a particular groove. You can see the fills and shakers added in on channels 3, 4, 5 and 6.
SYNTHS
The opening synth sound is from a sample pack I have that’s full of stab sounds. I created a MIDI channel to find the right note for the track and played with the settings in the MIDI sampler to open up the release and the cut-off on the frequency setting to create a low-pass filtered sound. I then automated this in the track, opening and closing the cut-off at various points.

As the track builds I made some variations in the stab sounds so there are moments at the end of every 8-16 bars that are different. For me, this keeps the listener interested instead of having to listen to just one melody running throughout the whole track.
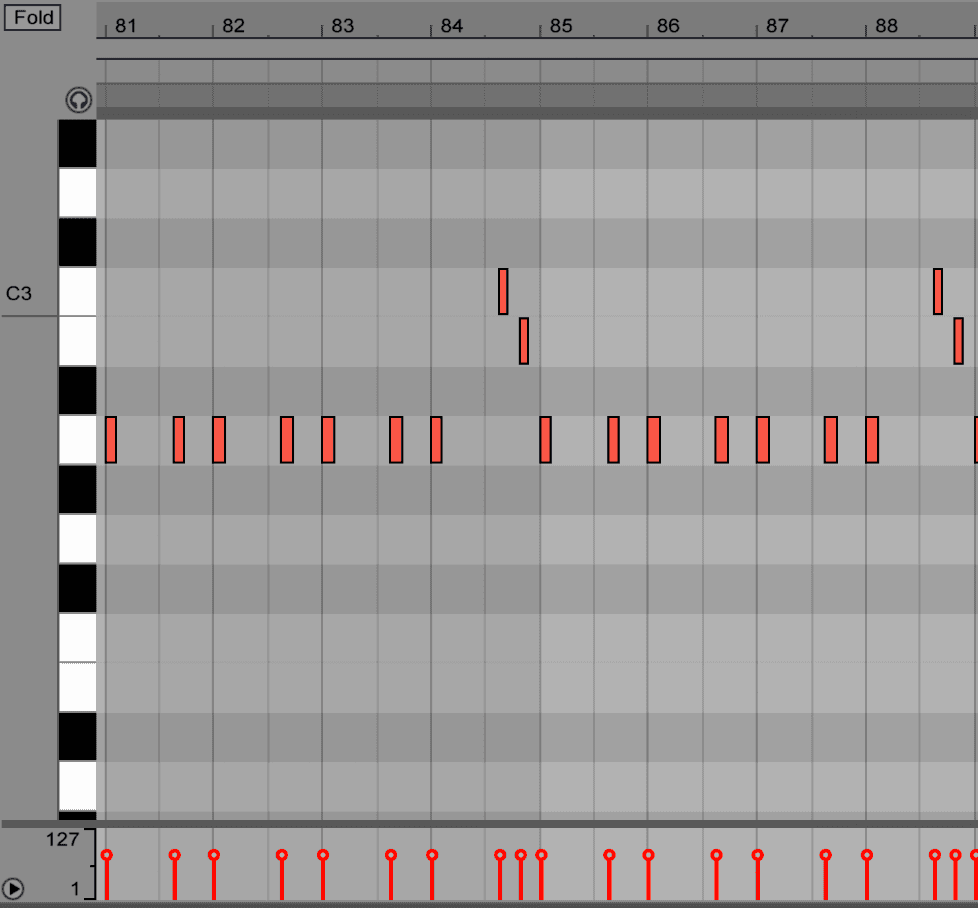
In the above image you’ll see a variation in the synth melody on the 4th bar. In the main break, the frequency of the stabs is increased and this also happens on the drop until the track breaks down and leads into the outro. I used Ableton’s EQ and some reverb so that the sound wouldn’t be completely static and could create some movement – you can see this in the following image where the 4th bar variation continues on through the next 4 bars during the peak of the track.
VOCALS

In the above image you can see how I automated everything so that the vocal builds up towards the drop, exits after the drop and comes back in until the outro. There’s also some vocal ad lib parts that were used as transitions and worked as question and answer with the synths. For further enhancement I used the Ableton ping pong delay and Waves reverb plugin to add effects to the vocal parts.
Login
X
