One of the most important elements of any techno record is a hard-hitting kick drum.
If you’re a producer, and you feel it’s time to toughen up your sound, then it’s vitally important that you have a sound understanding of how to create a powerful kick.
In today’s article, we’re going be looking at a few fundamental techniques that can be used to create the heavy-hitting low-end that Techno is known for.
While this tutorial is done in Ableton Live using stock plugins, the principles can just as easily be applied to Logic. If you really want to take your productions to the next level, we suggest picking up the FabFilter Suite for their EQ, compression and limiter plugins. Check them out here.
Let’s get started!
Start by loading up 3 separate kick drums into Ableton.
Each kick should have a different character. You want one high-end kick with a very short transient, one mid-range kick, and a low rumbly kick.
The idea here is to tweak the 3 of them until you get the sound you want.
Combined together, our starting point sounds like this:
The low-end of the kick should almost always be mono. In dance music, the bass is often the focal point, second only to vocals.
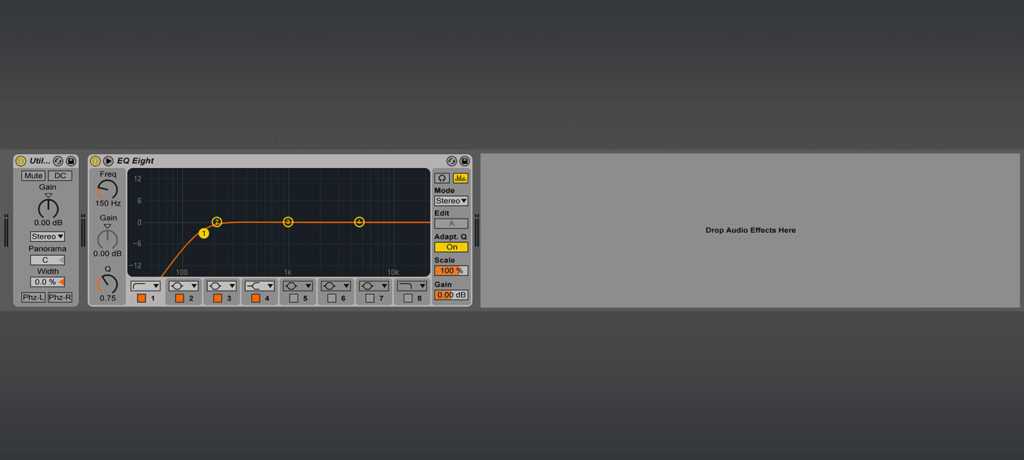
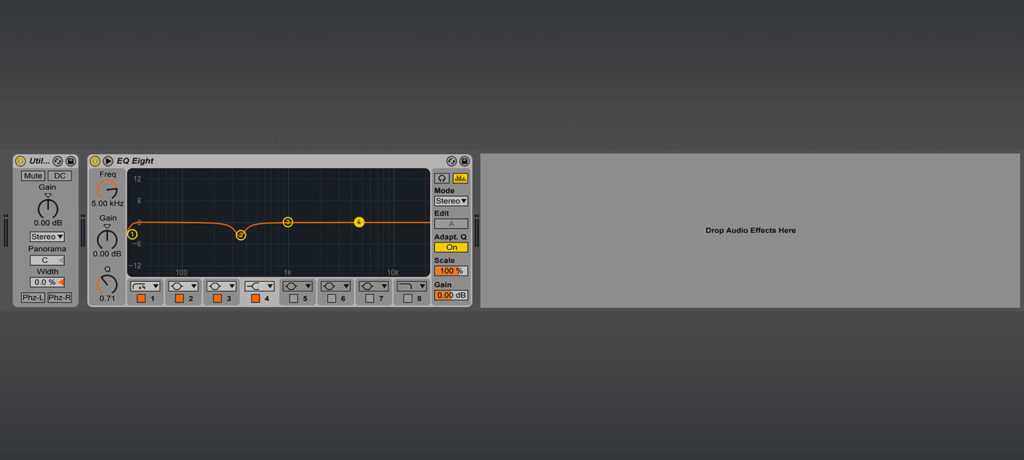
To be sure of this, you must load a utility plugin and draw the signal down to mono by reducing the width to zero.
I’ve applied this to both the Mid and Low Kick.
Next up, we need to apply some EQ and begin the sculpt our individual layers.
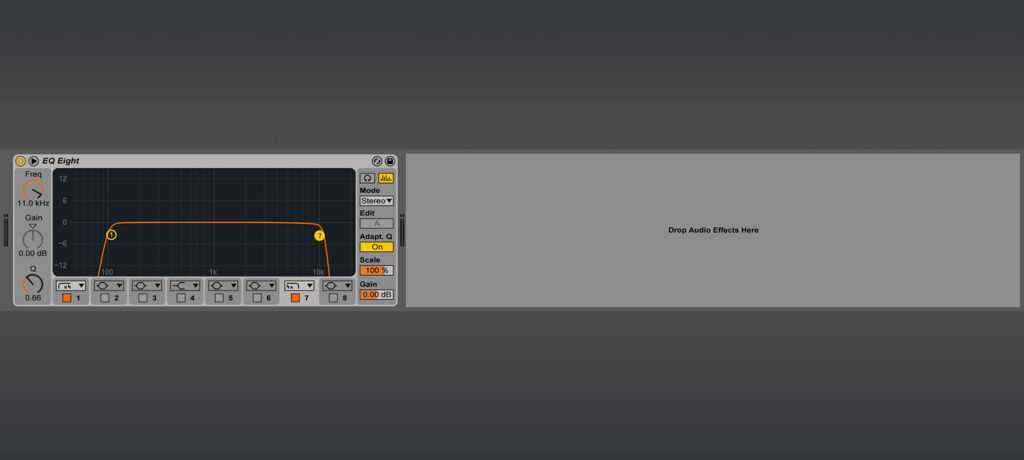
In this example, we’ve cut 100Hz to create space in the overall mix, whilst low-passing 10kHz to “darken” the sound.
If necessary, you can boost around 5kHz to add a bit of “crack” to your kick, although we haven’t in this example.
For the mid kick, I’ve cut 150-170Hz, again to create space in the mix for the other elements.
For the low kick, I’ve rolled off 30Hz to remove any ultra-low frequencies, just for clarity. Also, I notched 350-400Hz out of personal taste to reduce the overall presence of the kick.
Combined together, our EQ’d kick sounds like this:
If you’ve made it this far, pat yourself on the back!
Your creation is beginning to come to life. Up next, we have to process our kick!
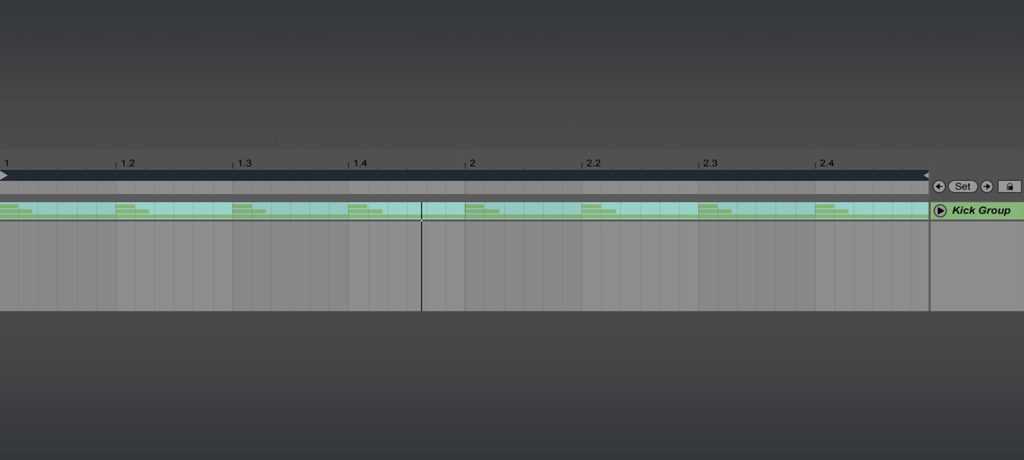
Next up, you want to group the kicks together in a summing track, so you can process them as a group.
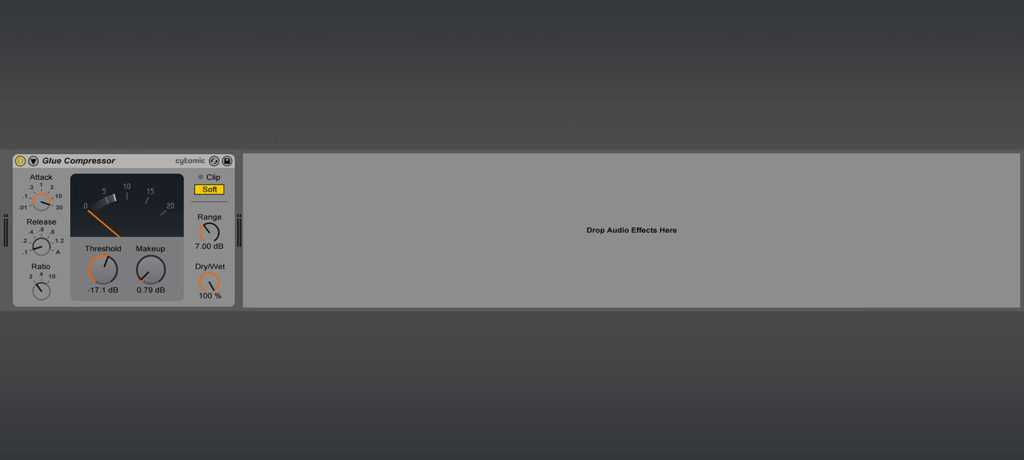
To keep the dynamics nice and solid, I’ve applied some light compression to the drum group using a glue compressor to round off the kick.
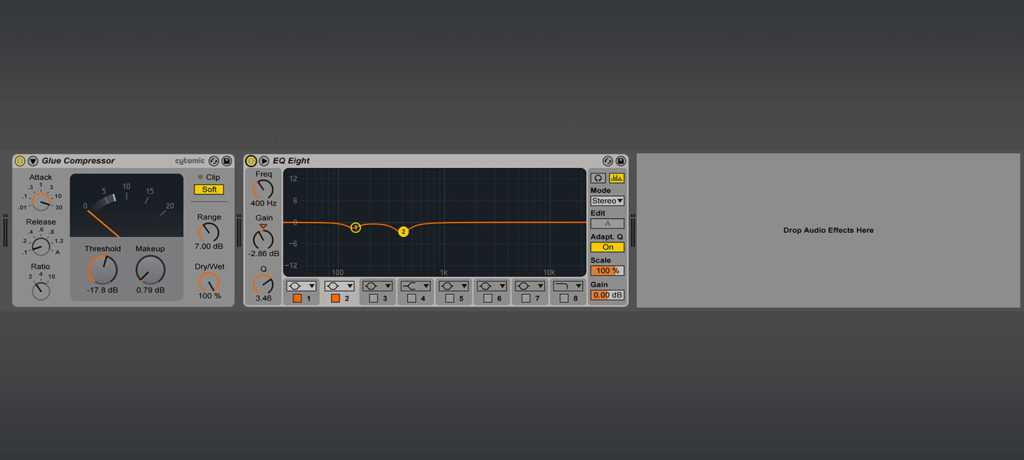
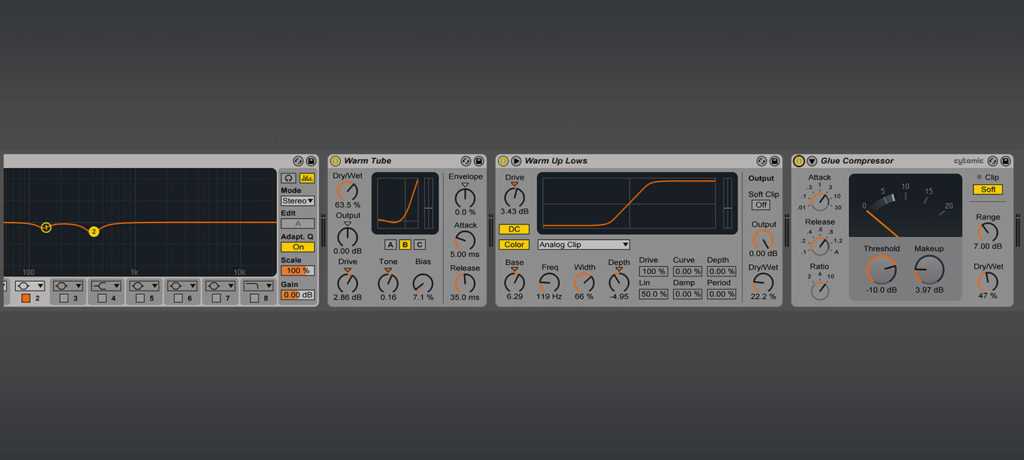
Now, we have EQ’d our drum group again, this time to sculpt the overall sound of the group.
I have notched around 140Hz to slightly reduce the boomy low end. We also added a notch around 400Hz to further reduce the presence.
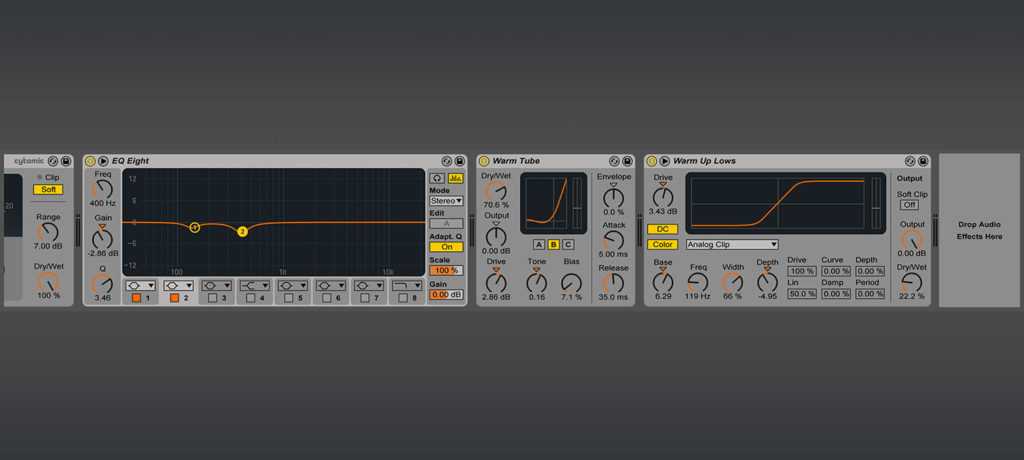
Up next, we have one of the most important elements of making your tracks stand out: saturation.
Saturation is one of the most important concepts to cover when learning to produce.
To quote our very own D.Ramirez:
“Saturation is the most important thing. It makes everything a little bit louder and fatter, and shaves off the transient, making it quieter. Saturation does a similar thing to compression in an easier to control way. It adds harmonics and changes the waveform, in itself, this is a light form of distortion that is quite pleasing. It makes your sounds warmer, fatter, crunchier, and perhaps even tougher.”
Make sense? Perfect. As you can see, D.Ramirez’s production knowledge reaches far and wide throughout the spectrum of Electronic music.
Don’t forget, Toolroom Academy offers you the chance to work alongside this internationally acclaimed hitmaker both online and in the Toolroom studios in London. You can check out our current course offerings here.
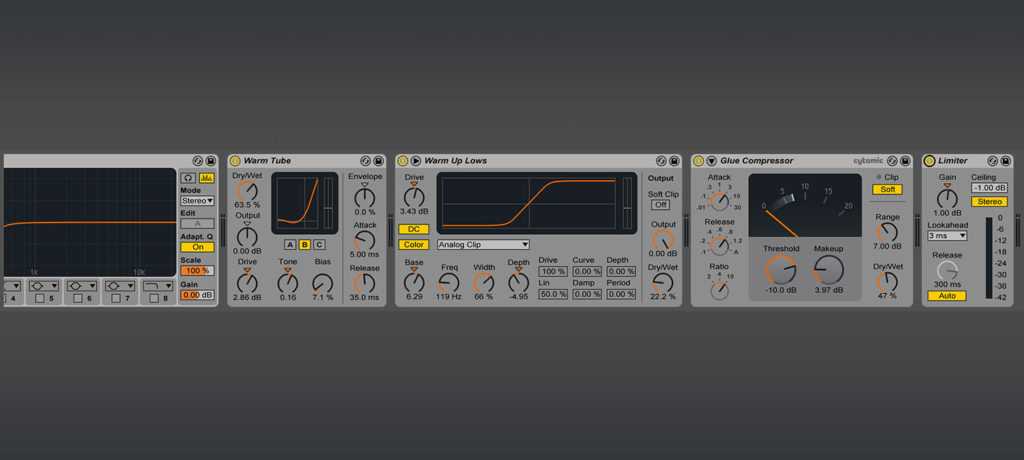
Next up, to achieve a little more punch and richness in our kick, we’ve added another instance of the glue compressor.
This time we hit the signal a fair bit harder, whilst blending the wet/dry at 50%, achieving parallel compression.
Next in our signal chain, we’ve added some light limiting as a final wall of defense to prevent any nasty frequencies poking through.
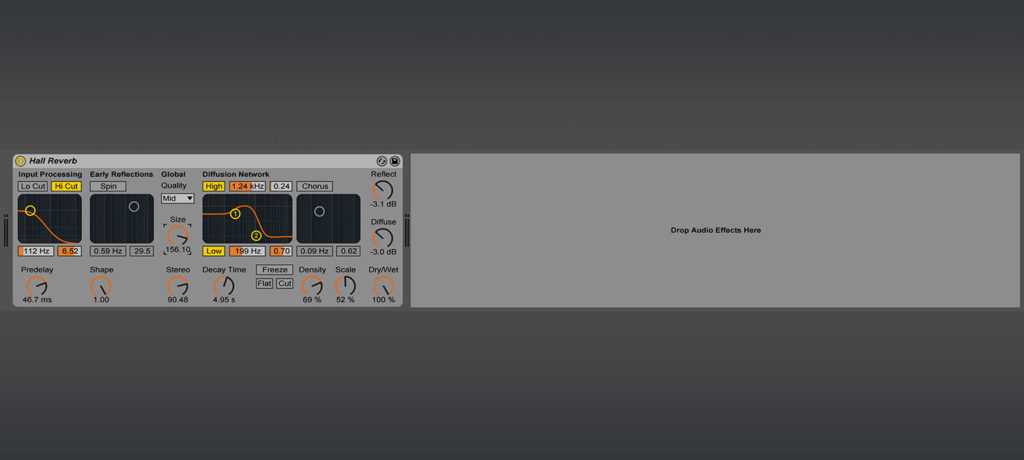
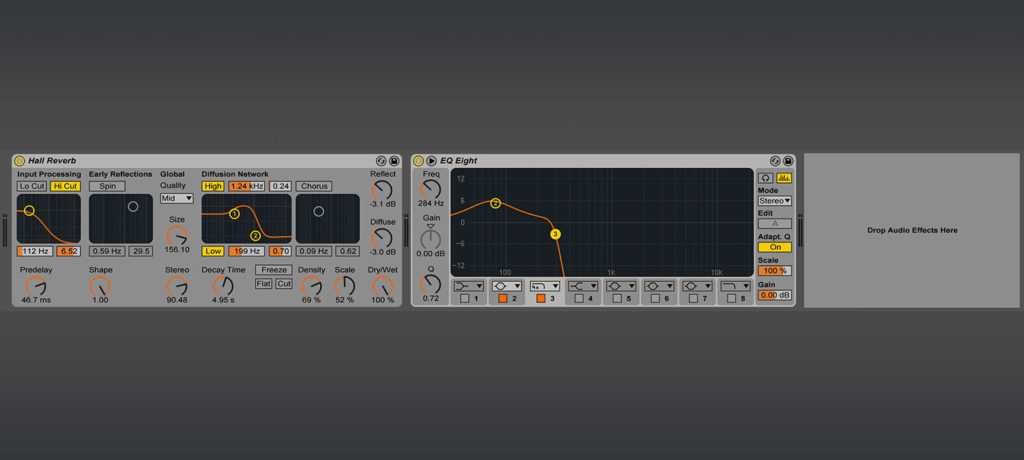
Finally, the main bulk of our kick is complete. Now, it’s time to start thinking about reverbs. For this instance, I went with the Dark Hall preset in Ableton, and tweaked the diffusion and pre-delay to fit the sound we were going for.
For final touches, we added an EQ Eight, applying a drastic cut to the high end, as well as boosting the reverb fundamental to achieve a rounded and balanced sound.
And there you have it. Your Techno production journey can now commence.
Now that you know how to make proper techno kick, it’s time for you to experiment and get creative with the technique itself.
To be a successful producer in today’s musical climate, innovation is key. Best of all, we’re here to help you unlock your true potential in the studio.
Toolroom Academy’s 16 Week Creativity: Unlocked course is specifically designed to help you break through creative barriers and make your tracks stand out in today’s highly competitive music scene.
Still struggling with some of the basics of making House, Tech House and Techno? Our 12 Week Production Certificate course can help you on your way to building a credible, professional-grade record.
What are you waiting for? Get in touch with us today—and make it happen.
