has been added to your cart.
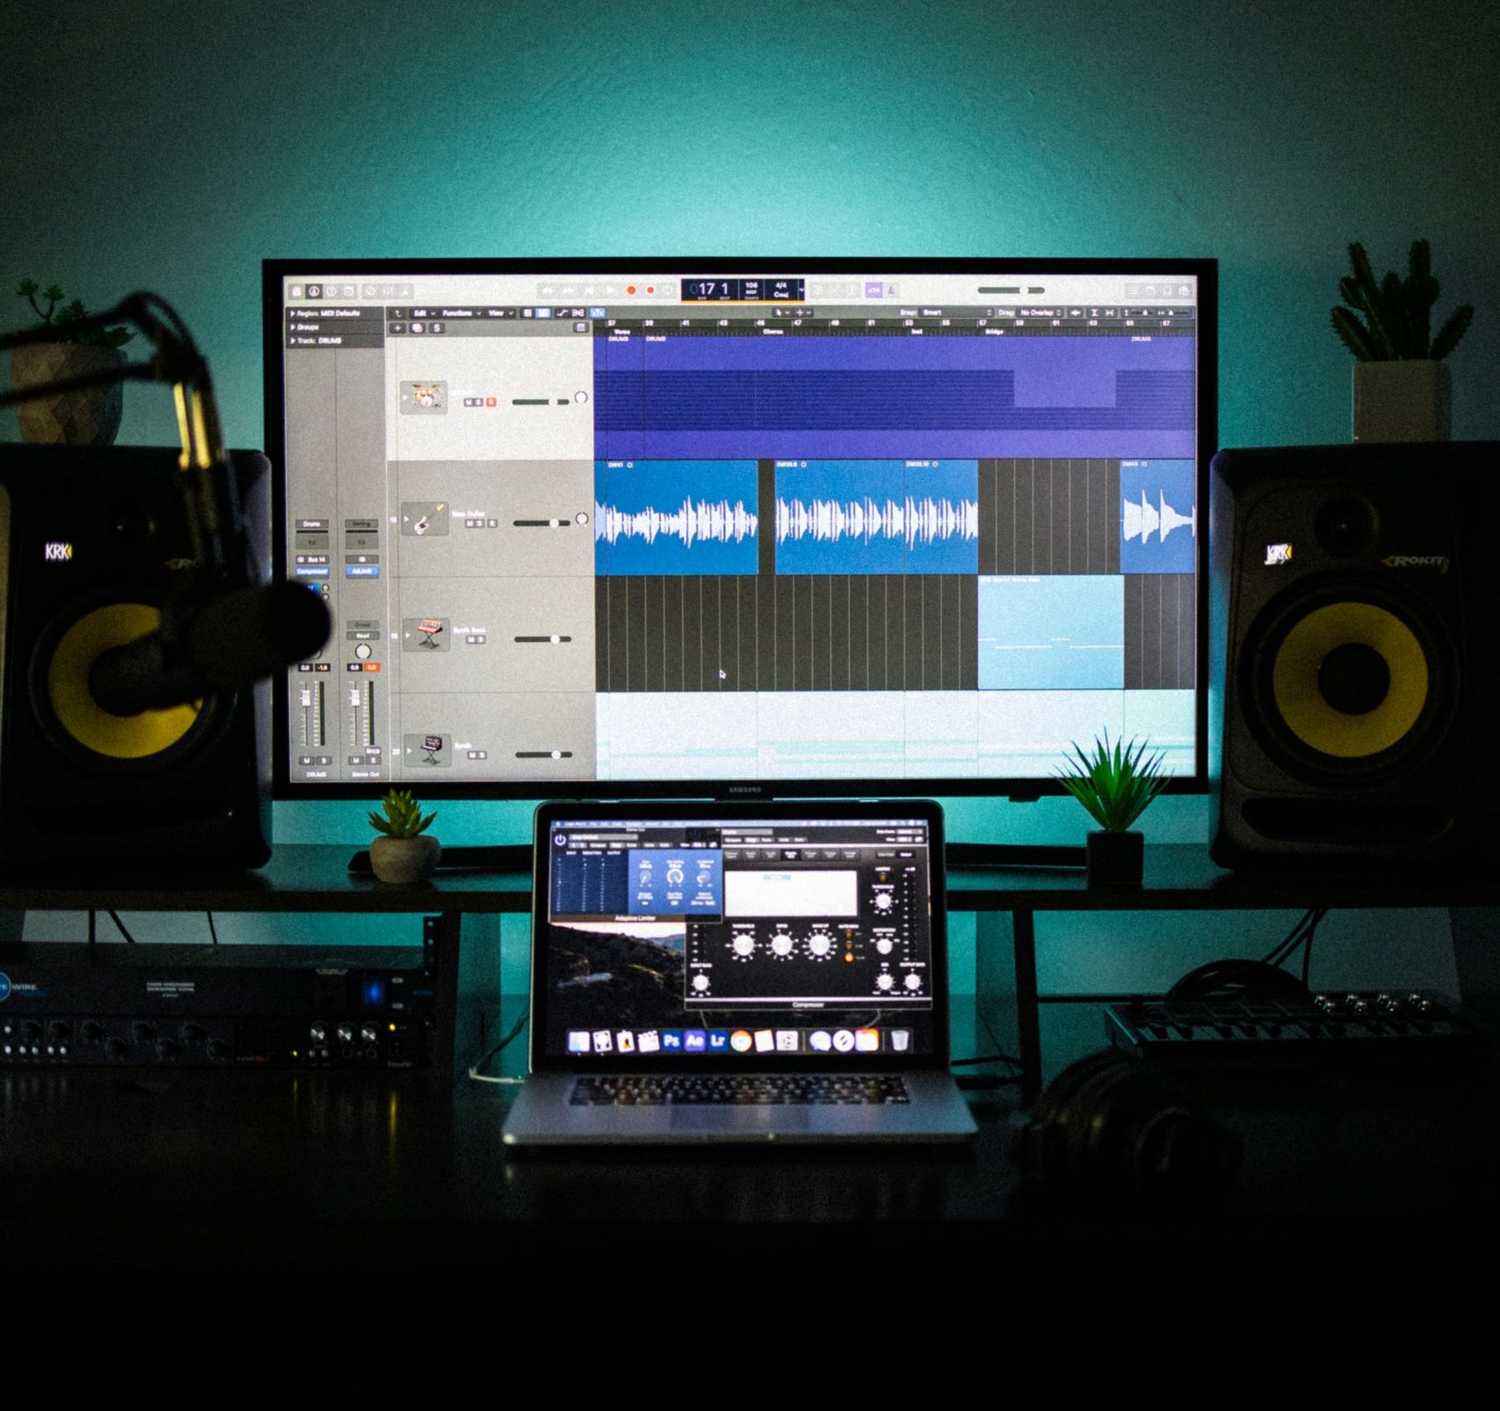
Setting up your home studio
Let’s boil this intimidating topic down into 3 main parts that cut through all the crazy math and science, to give you some simple tips on how to get your room sounding cleaner and tighter.
Your Room, your speakers and your ears
I think this is one of the most important, if not the most important place to start the huge conversation about music production. Your room, your speakers and your ears. Now, this topic is huge and can be quite off-putting, with crazy math and even crazier price tags. This could be the reason people tend to avoid it or feel that they can sort it out later, after learning how to EQ, compress a kick or whatever it is that they feel is far more fun or important for writing a song. But believe me, there is no point in knowing every production trick there is, if the room you’re in is giving you an unequal or uneven sound. So let’s boil this intimidating topic down into 3 main parts that cut through all the crazy math and science, to give you some simple tips on how to get your room sounding cleaner and tighter.
You (Listening Sweet Spot)
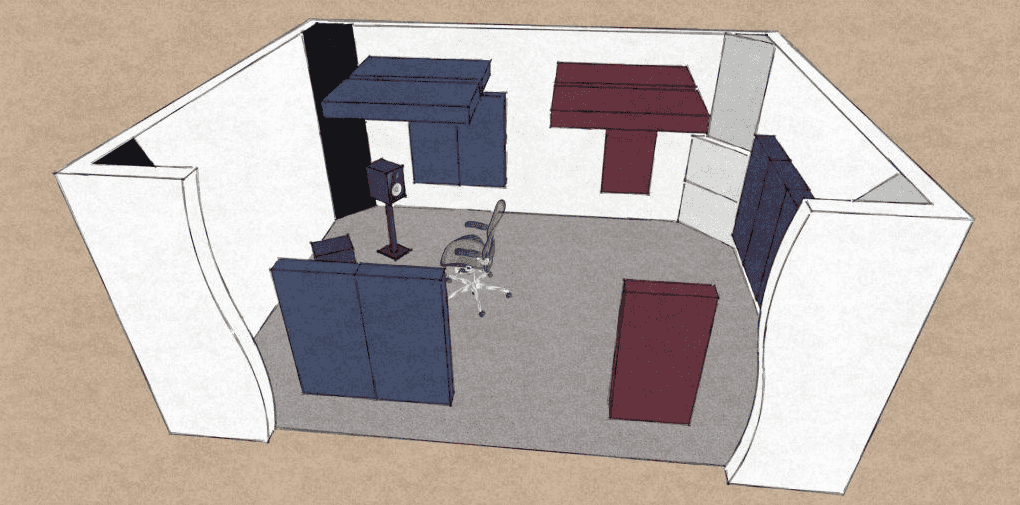
First up is your listening position in regards to the shape and size of your room. In Fig.1 you can see a typical room shape, along with speaker placement and listening position (don’t worry my room is a square too, but these tips can still apply). The first thing to look at is which bit of the room your studio – and you – should be. The best way is to sit facing the shortest wall, so the longest walls are to the left and right of you; keeping the back wall as far away as possible, as the back wall creates most of the problems.
Next up is the ‘Golden Rule’, which is where your ears should be in regards to the size of your room. It turns out that almost everyone agrees that it’s 38% of the length of your room. The main place to avoid is dead centre; my room is very small so I end up sitting closer to the back wall to find the sweet spot.
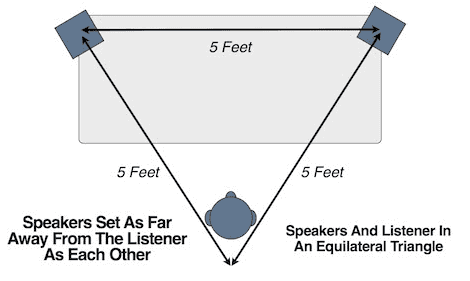
After this, it’s time to look at the position of your ears in regards to the speakers. The distance from the right ear to the right speaker and the left ear to the left speaker should be the same measurement. Your left and right speakers also want to be the same distance apart from each other as this measurement. This makes an equilateral triangle and is known as the sweet spot.
Speaker Placement
The distance each speaker should be from the walls is a whole topic of its own, but the general rule of thumb is you must have equal measurements from the speakers to the sidewalls. This is because, if your left speaker is closer to the left sidewall then the right speaker is to the right sidewall, you’ll have all kinds of problems with your stereo image. You’ll get peaks and nulls of frequencies causing lots of complications.
For the front wall, you want the two speakers to be an equal distance but not the same measurement as the sidewalls. Let’s say 1ft from the front wall and 2ft from the sidewalls whilst the height shouldn’t be bang on in the middle of the floor to ceiling measurement. For example, if your room’s height is 10ft, you don’t want the height of your speaker to be 5ft, you’ll want to aim off that if possible, normally lower makes the most sense. Once you have your speakers placed and you have measured the equal distance and used the ‘
‘Golden Rule’ to find your listening sweet spot (refer to Fig1), we want to make sure our speakers (or our ears) are the right height and angle in respect to our sweet spot.
You want your ears to be as close to the same level as the tweeter level on both speakers, which is the bit in the middle or closer to the top of your speaker where the higher frequencies come from. This will need a little bit of trial and error. Some people like to be lower than this; I really do think it depends on the room response and the speakers you are using. For the angle, sit in your newly found sweet spot and face forward, looking at your screen (TV/monitor). As you glance at each speaker you’ll only want to see the front of each. If you can see a bit of the side on either speaker or both speakers, you’ll need to rotate the speakers until the fronts are the only part of the speaker you can see. One last thing in regards to your speakers is to isolate them from the desk or speaker stands. This can be done in various ways, foam isolators or a bunch of crazy looking things that really help stop the frequencies from bouncing around into your desk and then back into your speaker. This seems like a small thing but it makes a huge difference. I really recommend ‘Googling’ some companies and products on Speaker Isolation.
Room Treatment
Room acoustic treatment is the method used to control the sound in your room and it’s a huge topic. Here, I will boil down the information into some quick tips to help you tame those pesky bass lines and harsh top ends. However, this really is more of an overview of the subject to help get you started.
Figure 3A shows wall panels, bass traps, back wall panels and ceiling mounted panels. Now, to save us time I’m not going to talk about making your own panels or why proper Rockwall panels are better than cheaper foam panels (that’s an article all to itself). What we will look at though, is where to place the panels and why. I totally understand that most of us have windows, doors and little ‘in coves’ in our rooms, so let’s just make it simple and look at the basics of treating a basic room (refer to Fig.3).
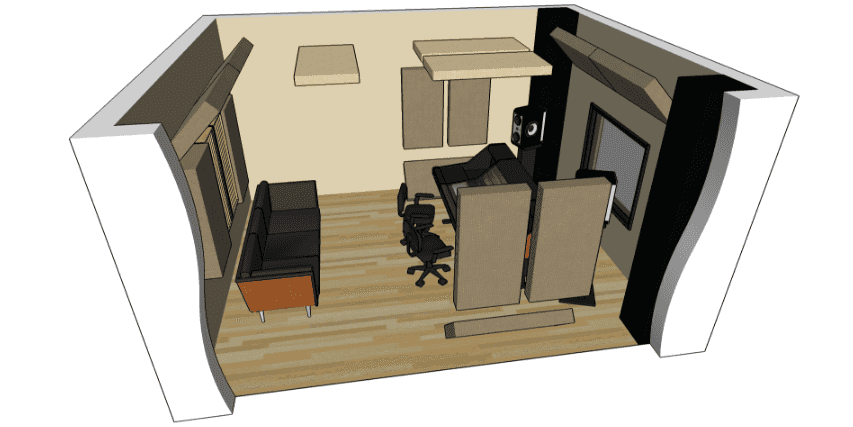
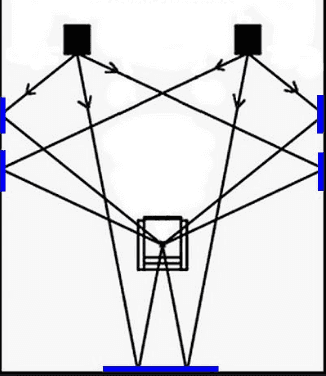
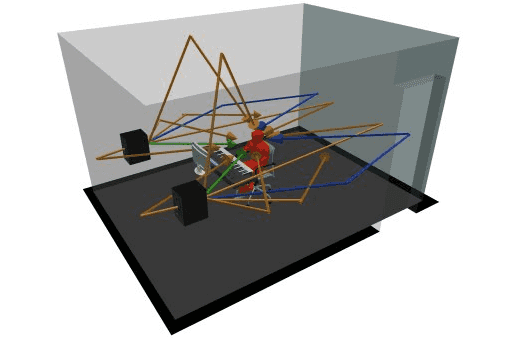
First, lets look at how to get rid of that harsh, unclear mid and top end by placing panels on the left and right walls in what is commonly referred to as the first and second points of reflection. Looking at Fig.3A compared to Fig.3, we can see how placing acoustic panels in this way tames mid to upper frequencies from hitting the wall – bouncing back into the room – causing spots where the sound is cancelling out particular frequencies or areas where frequencies are pilling up. This gives us an unclear sound making it practically impossible to EQ a song. You can easily find these points by asking a good friend to hold a mirror up to the front of the left wall at the same height as your speaker, then slowly walking from the front wall to the back wall, keeping the mirror facing out so whilst you’re sat in your sweet spot you can stop them as soon as you see the front of your left speaker. You have just found the first point of reflection! Make a mark or even a mental note and then kindly ask your chum to continue moving the mirror across the left wall until you see your right speaker. This is your second point of reflection (refer to Fig.2). Follow these steps on the right hand wall and place your acoustic panels at each point.
The back wall needs to be treated for low and high frequencies, some people would argue that this is the most important wall to treat. The most common thing to do is cover as much of the wall as possible. I personally have two large broadband bass trap panels from a company called GIKacoustics; these are placed so each speaker is directly aimed at each panel. However, for bigger rooms you’d need to add more. It’s worth mentioning something called a scatter plate at this stage. Scatter plates are panels that help to keep a natural sound in your room. If you over treat a wall it can sound dead, which isn’t good. But again, I won’t bog this simple article down with all that; let’s keep it simple!
Once we have the side and back walls sorted we want to look at our low-end problems. Bass frequencies build up in the corners of a room; so all four corners (or any annoying ‘in coves’ or fireplaces etc.) would ideally have bass traps from floor to ceiling. If you want to really go for it, every right angle is a corner, so the joint from wall to ceiling or floor to the wall will have some bass buildup problems that can all be treated with bass traps.
The final spots to treat are the ceiling and front wall. In some cases, the ceiling isn’t that necessary. If you have a hard floor and a big room or a really high ceiling, you’ll definitely want to mount a panel up on the ceiling or even a cloud panel; this creates a fake lower ceiling between you and your speakers. If you’re in a bedroom with a carpet, you’ll probably find that does enough. I personally feel that one panel on the ceiling is ample for a standard room size. The front wall shouldn’t give you too many problems as long as you have the back wall and the front corners properly treated. You may find some additional panels help, especially in a large room.
And there you have it, a very basic set up. Now, there are so many ways to treat a room, including types of panels, ways to measure the perfect this or perfect that etc. therefore I urge anyone that has found this interesting at all, to head out into the wild world of Google and start reading. There’s tons of information out there and once you start getting into the ‘room acoustics’ world, it’s fascinating and very, very important! If you want to be able to make your songs sound as good as the big guns in the industry, you’ll want to make sure your speakers and your room are being true to you!
Login
X
